
Traffic Stars FAQ
Step 1 - Log in to TrafficStars
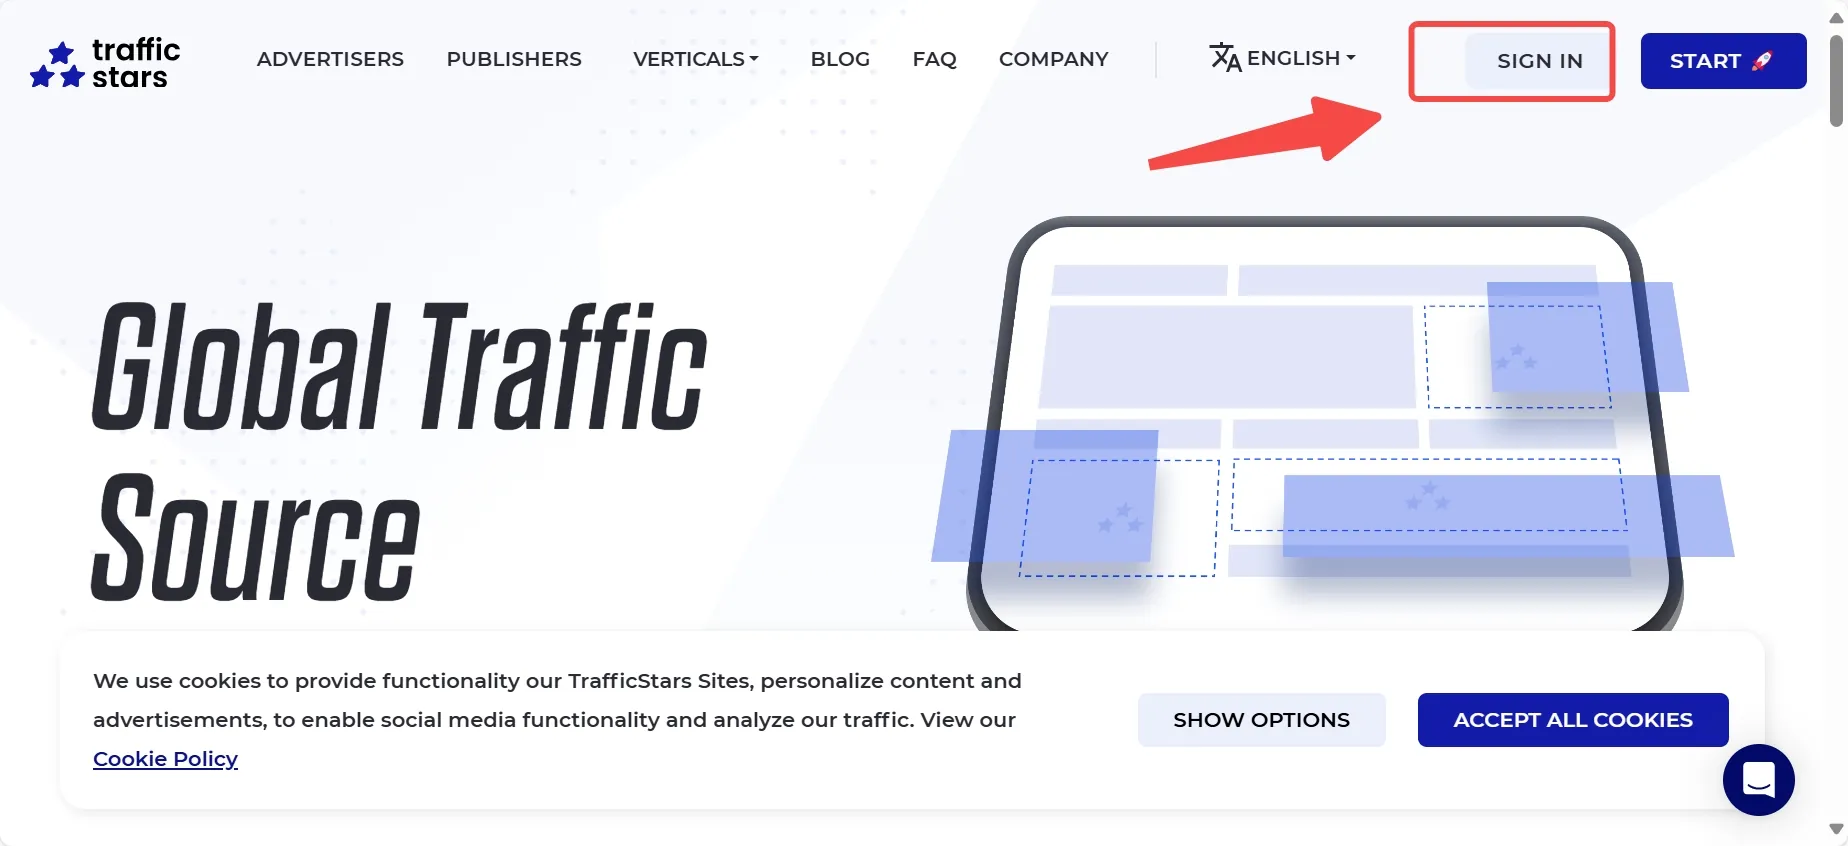
- Log in to trafficstars.com and click Sign In to access the dashboard;
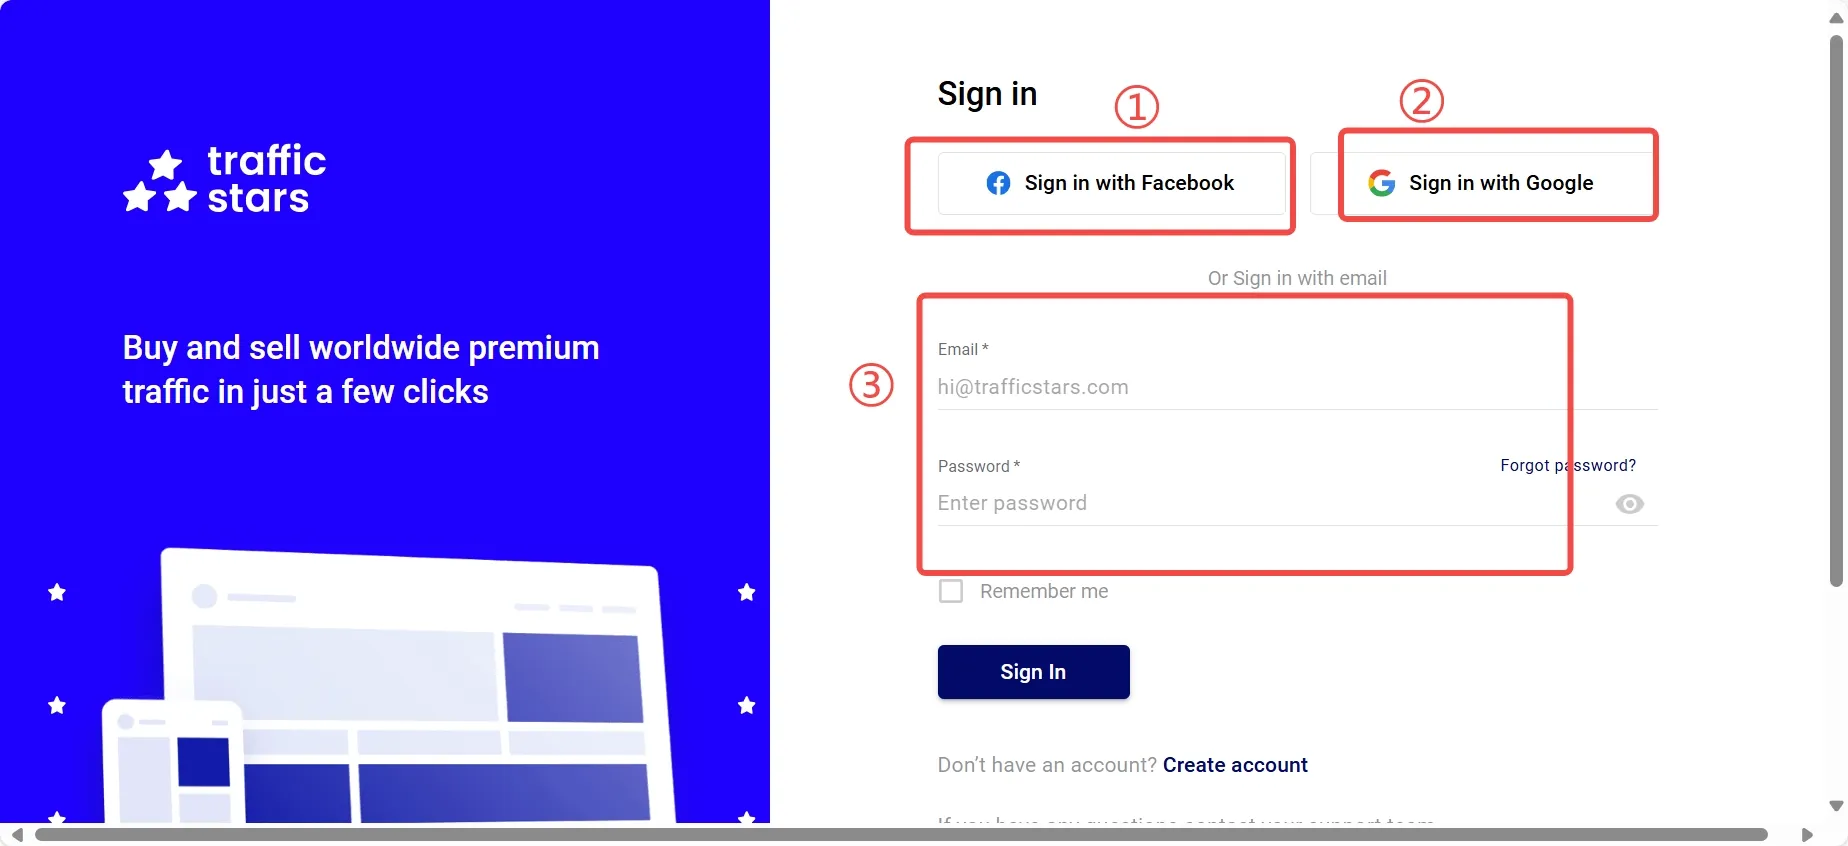
- Choose the appropriate account type to log in based on your needs;
Step 2 - Create a New S2S Postback
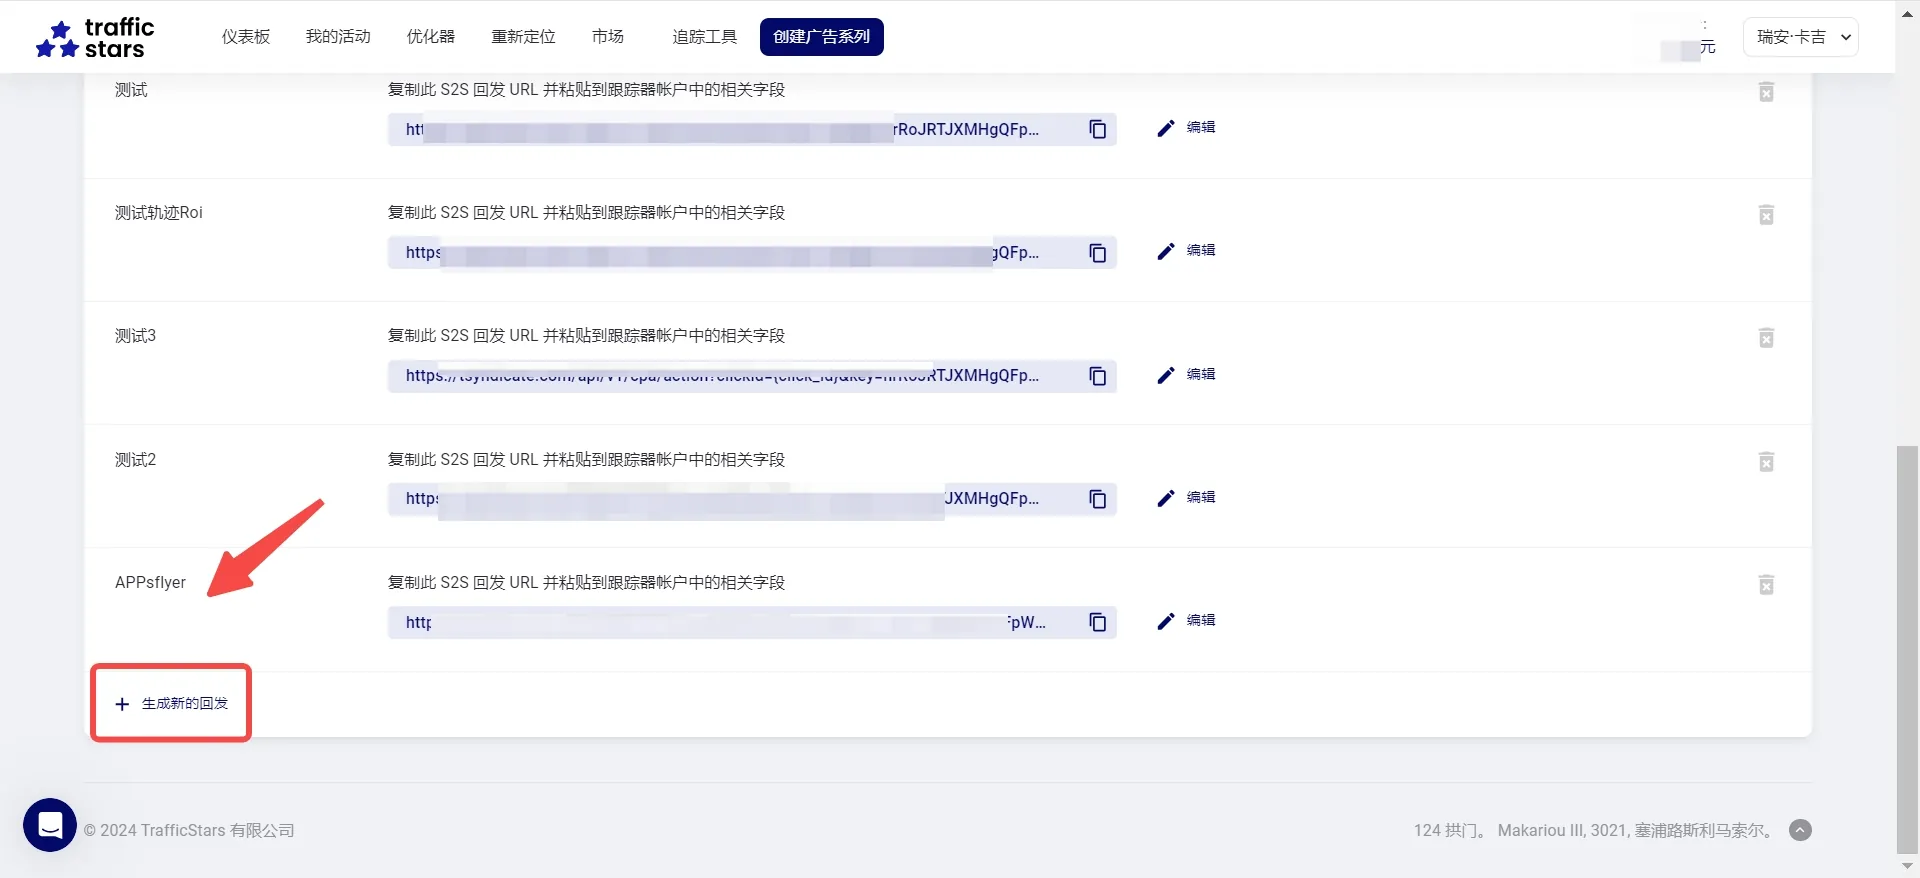
- In [Tracking Tools], find S2S Tracking and click [Generate New Postback]
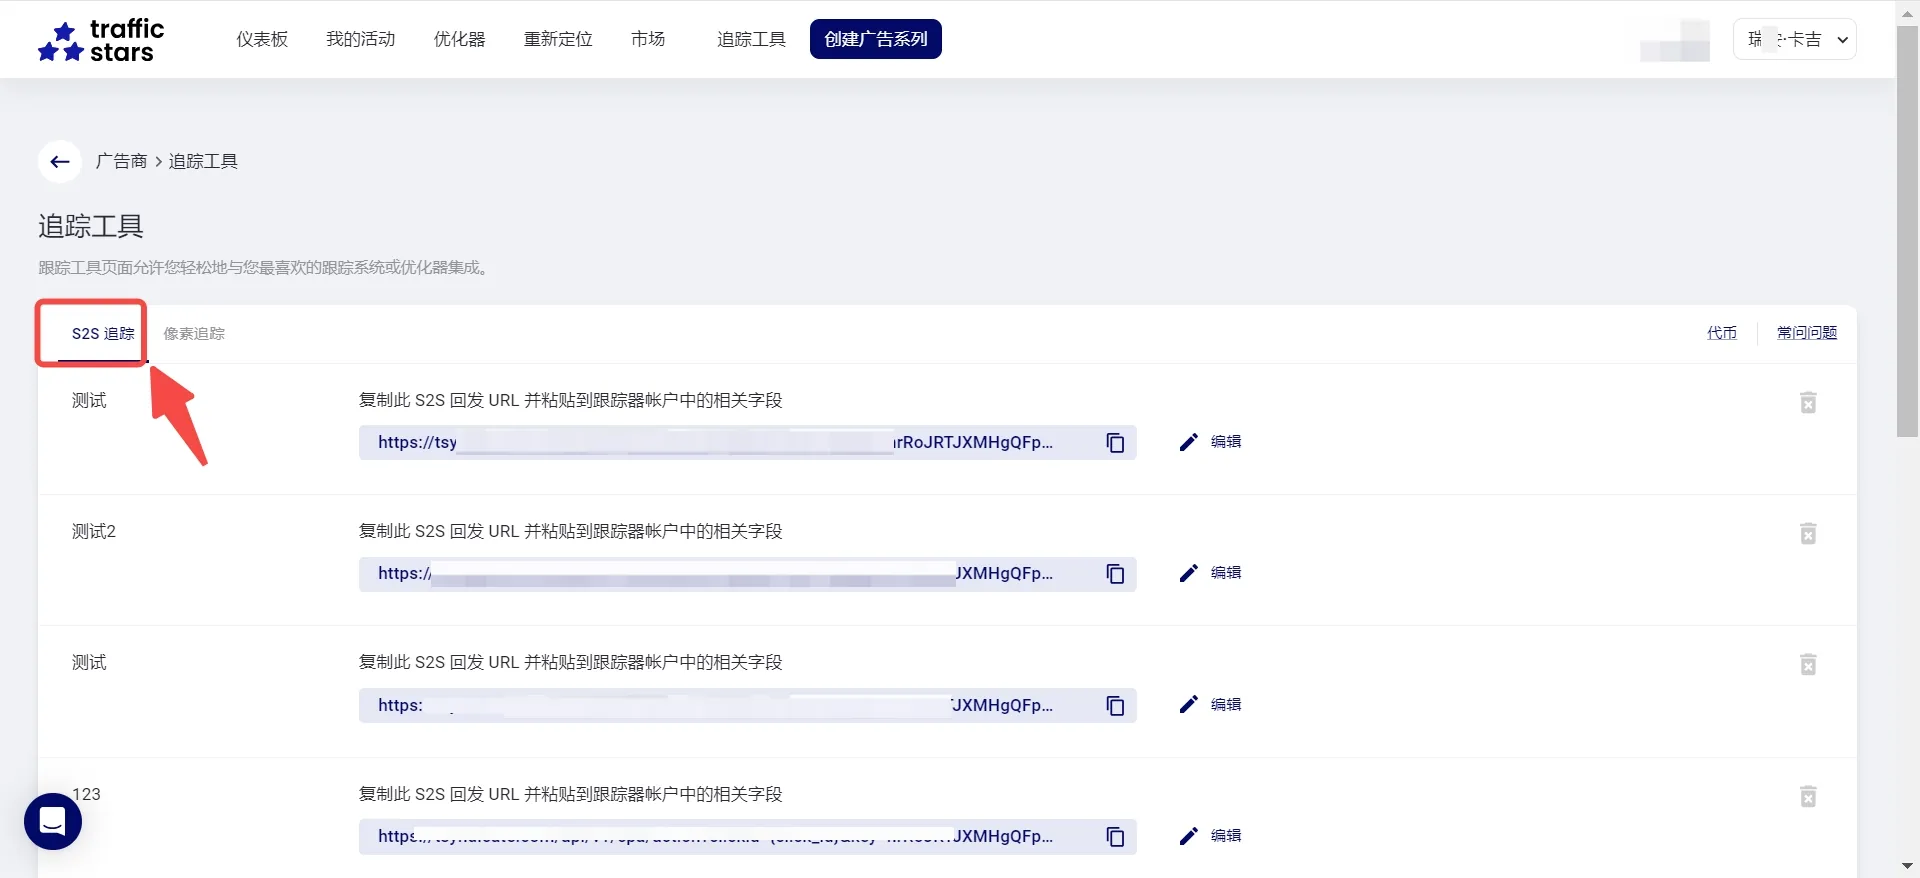
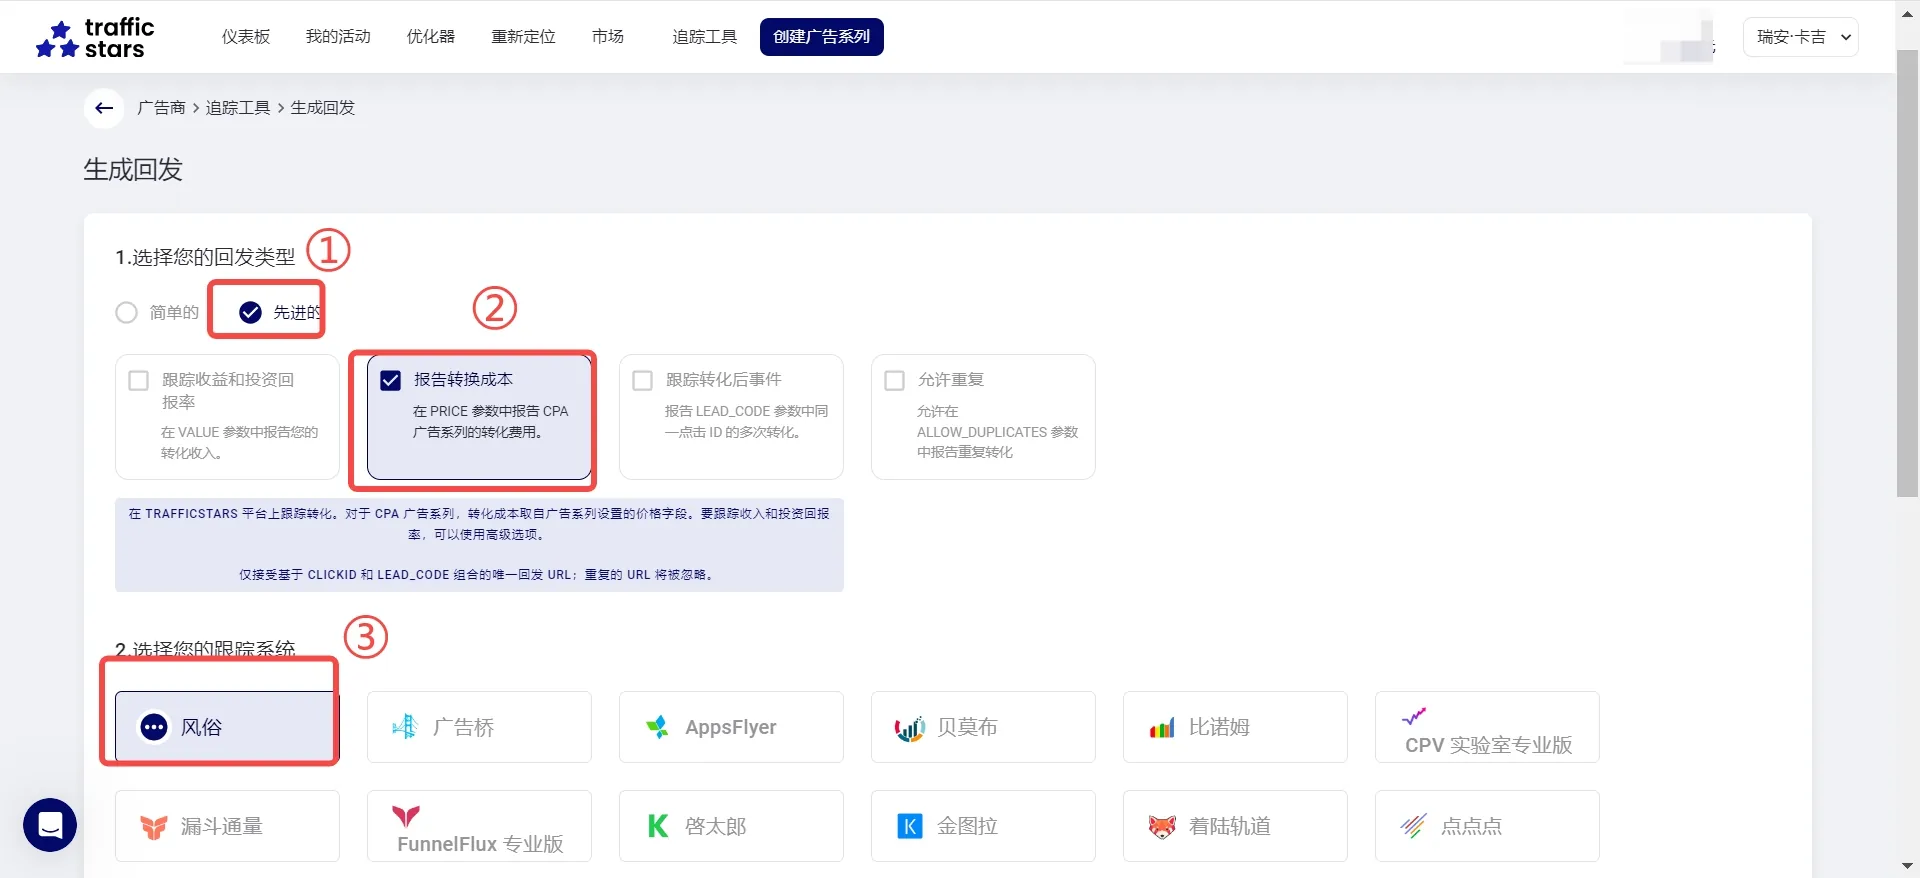
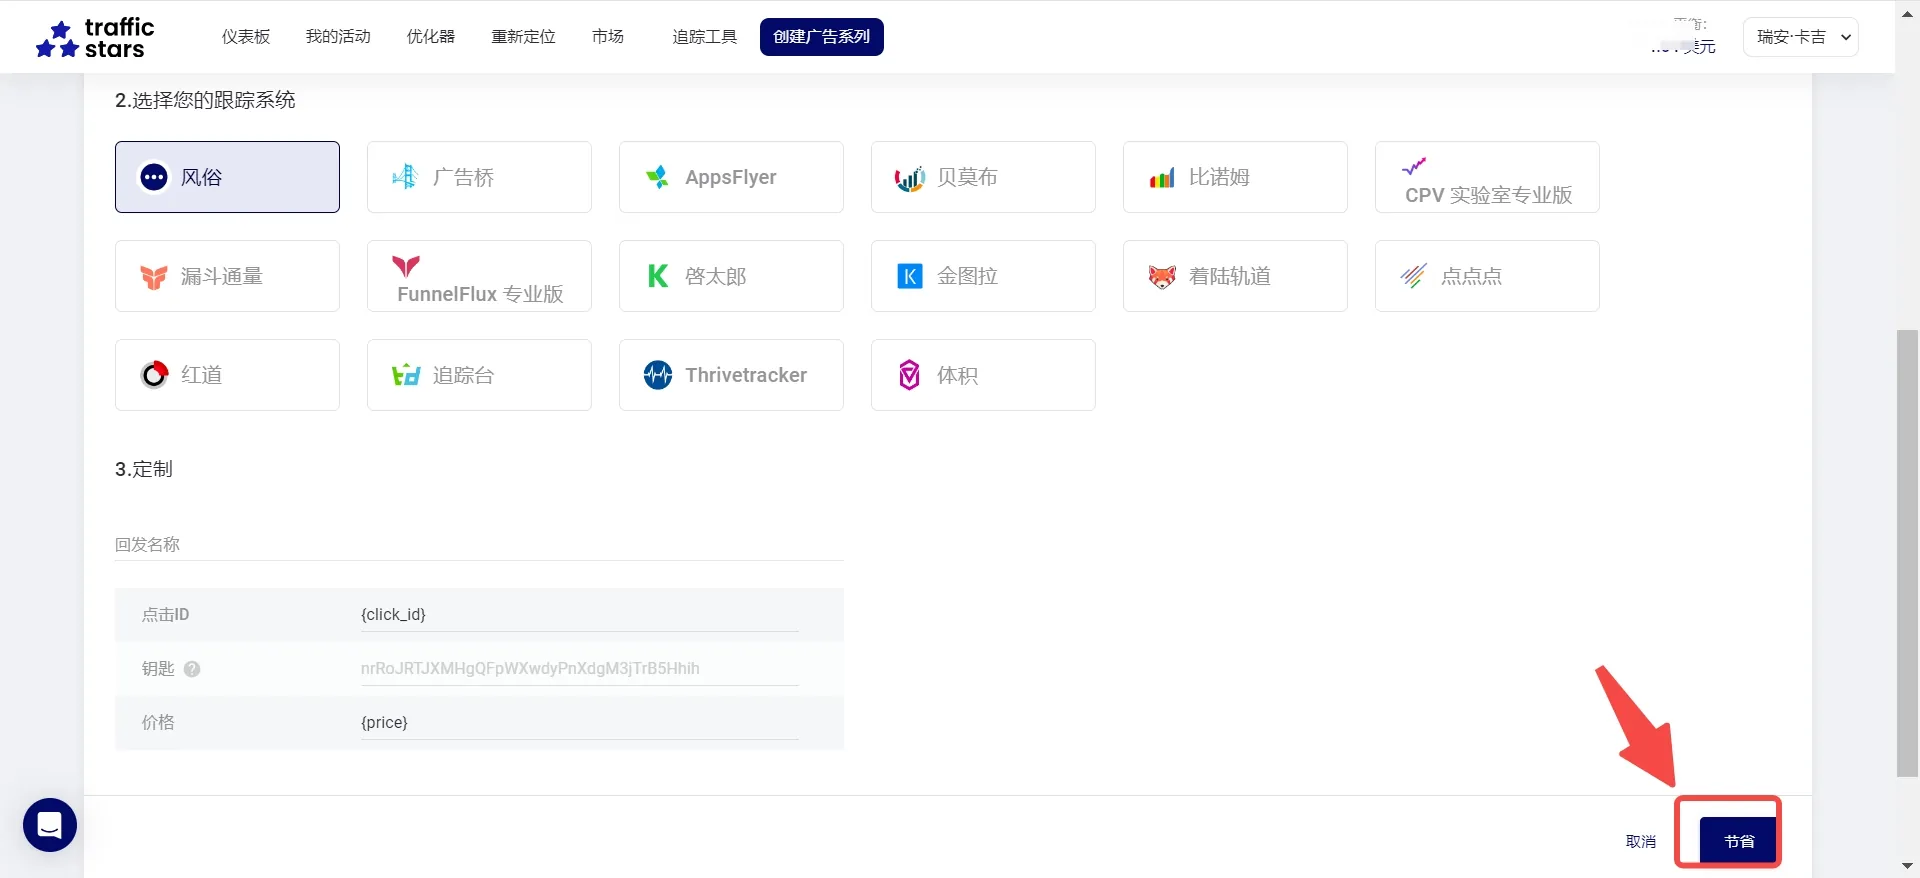
- Select the postback type and tracking system as shown below, then click Save;
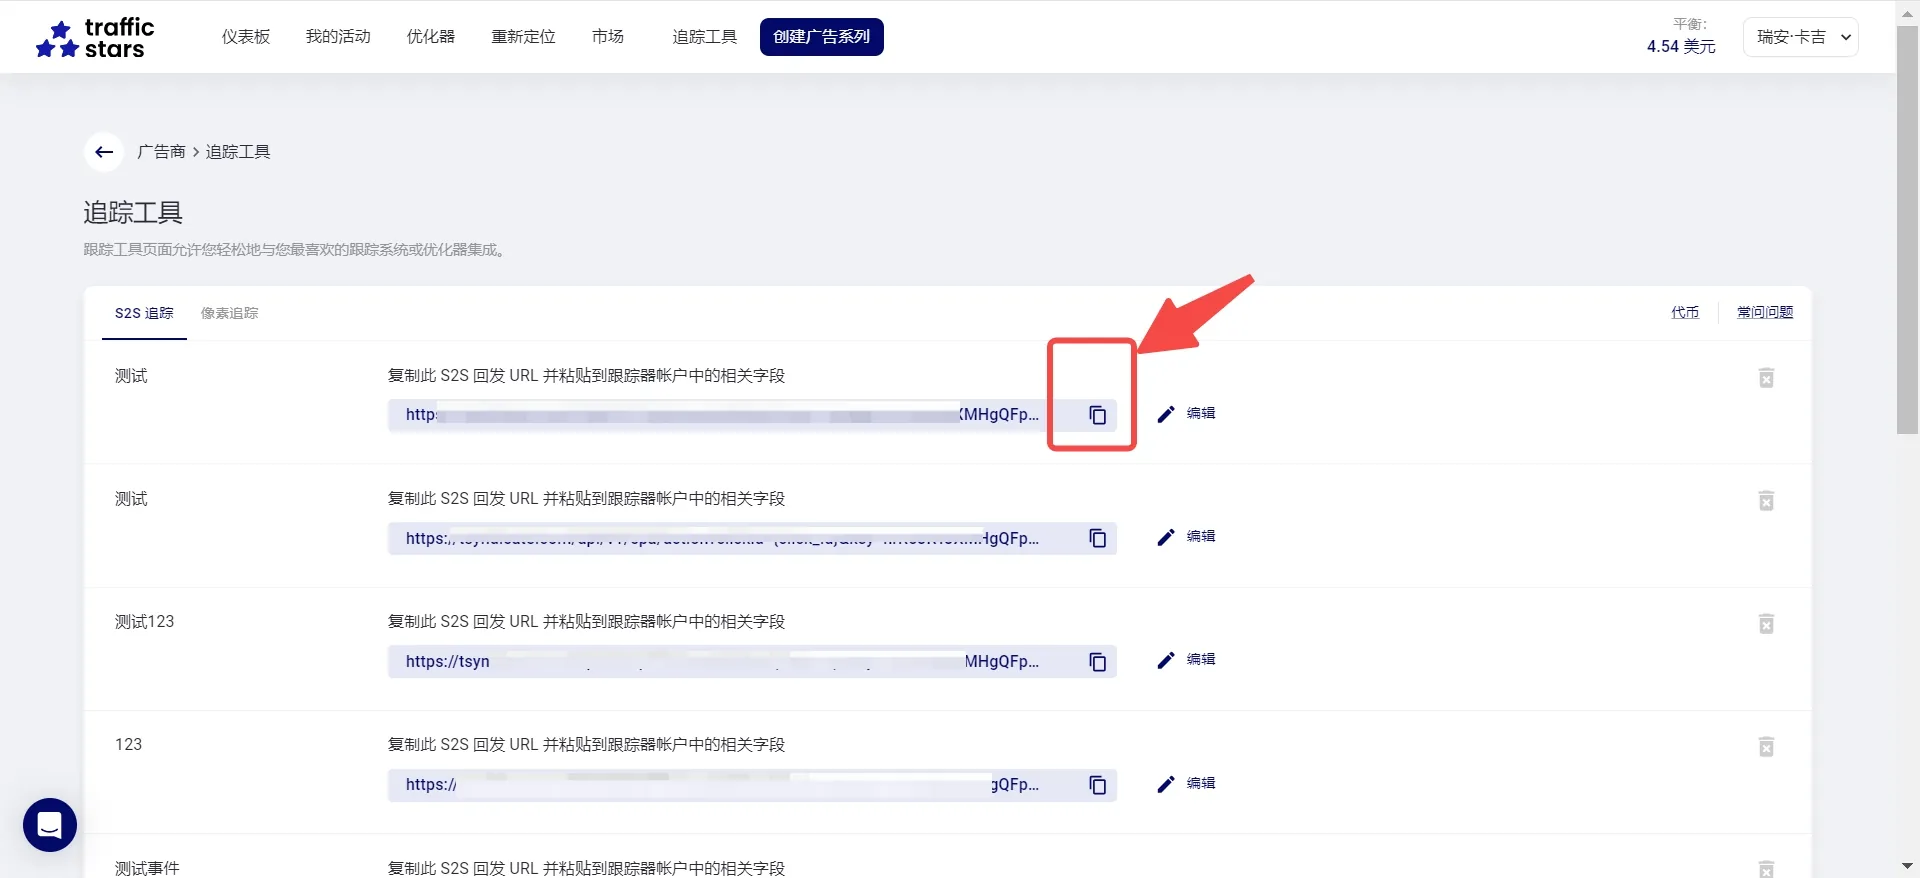
- Find the configured S2S link, click Copy, and paste it into the ROIBest dashboard;
Step 3 - Fill in ROIBest Dashboard Information
- In [Pixel Configuration], select [Traffic Stars], then click [+S2S Tracking]
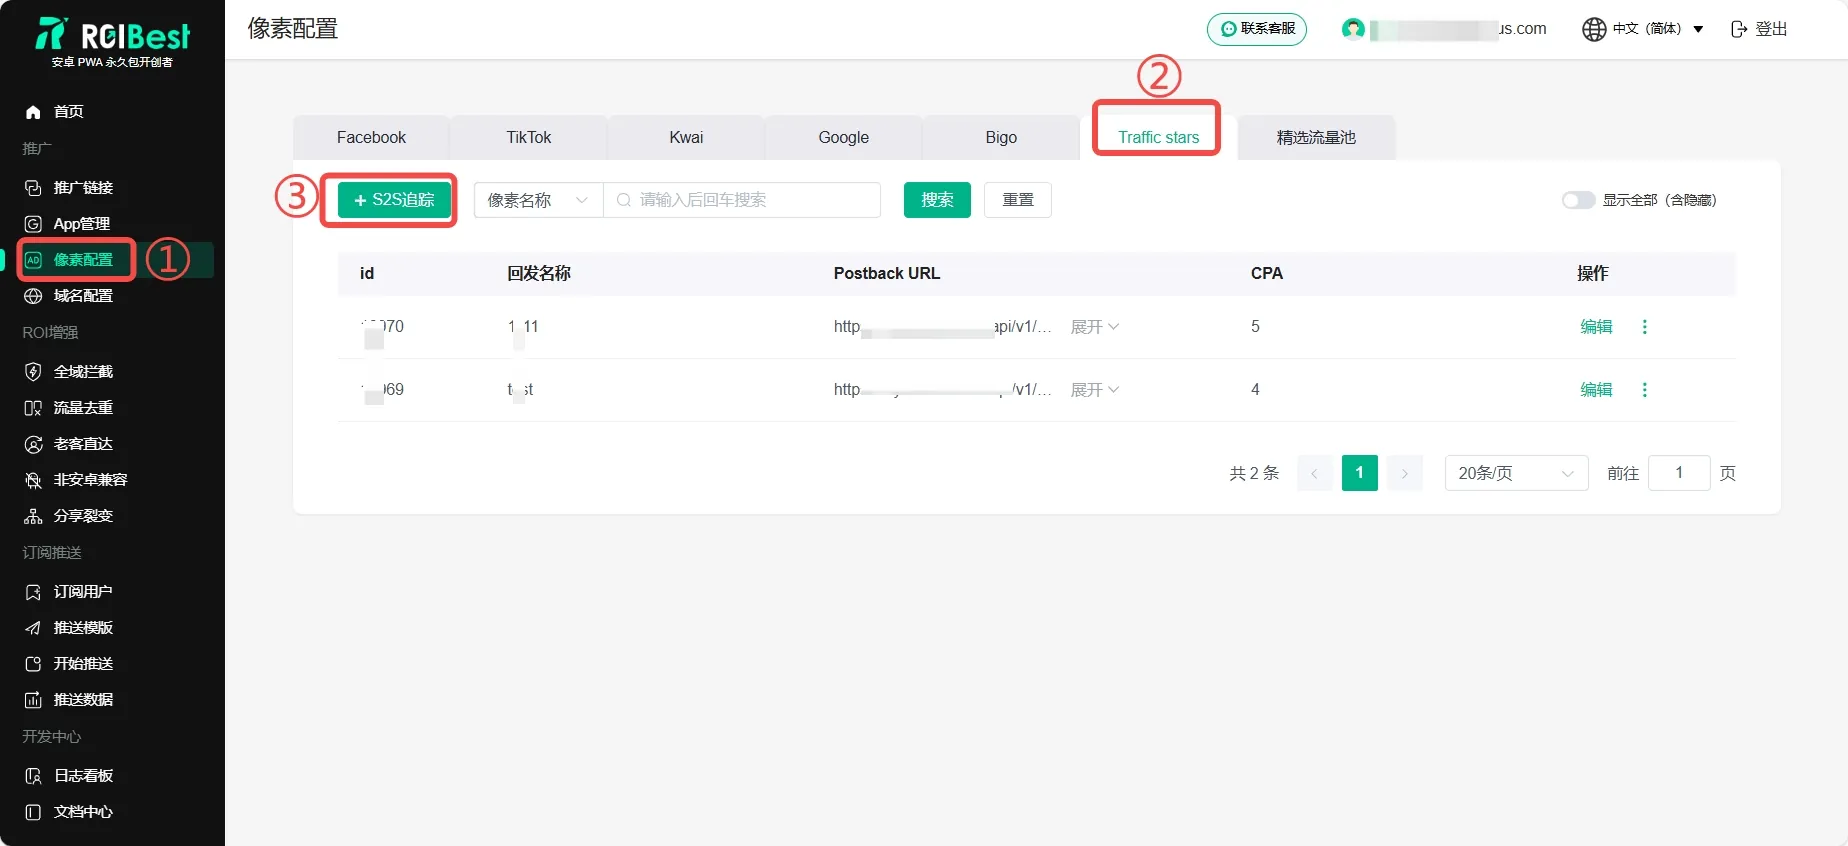
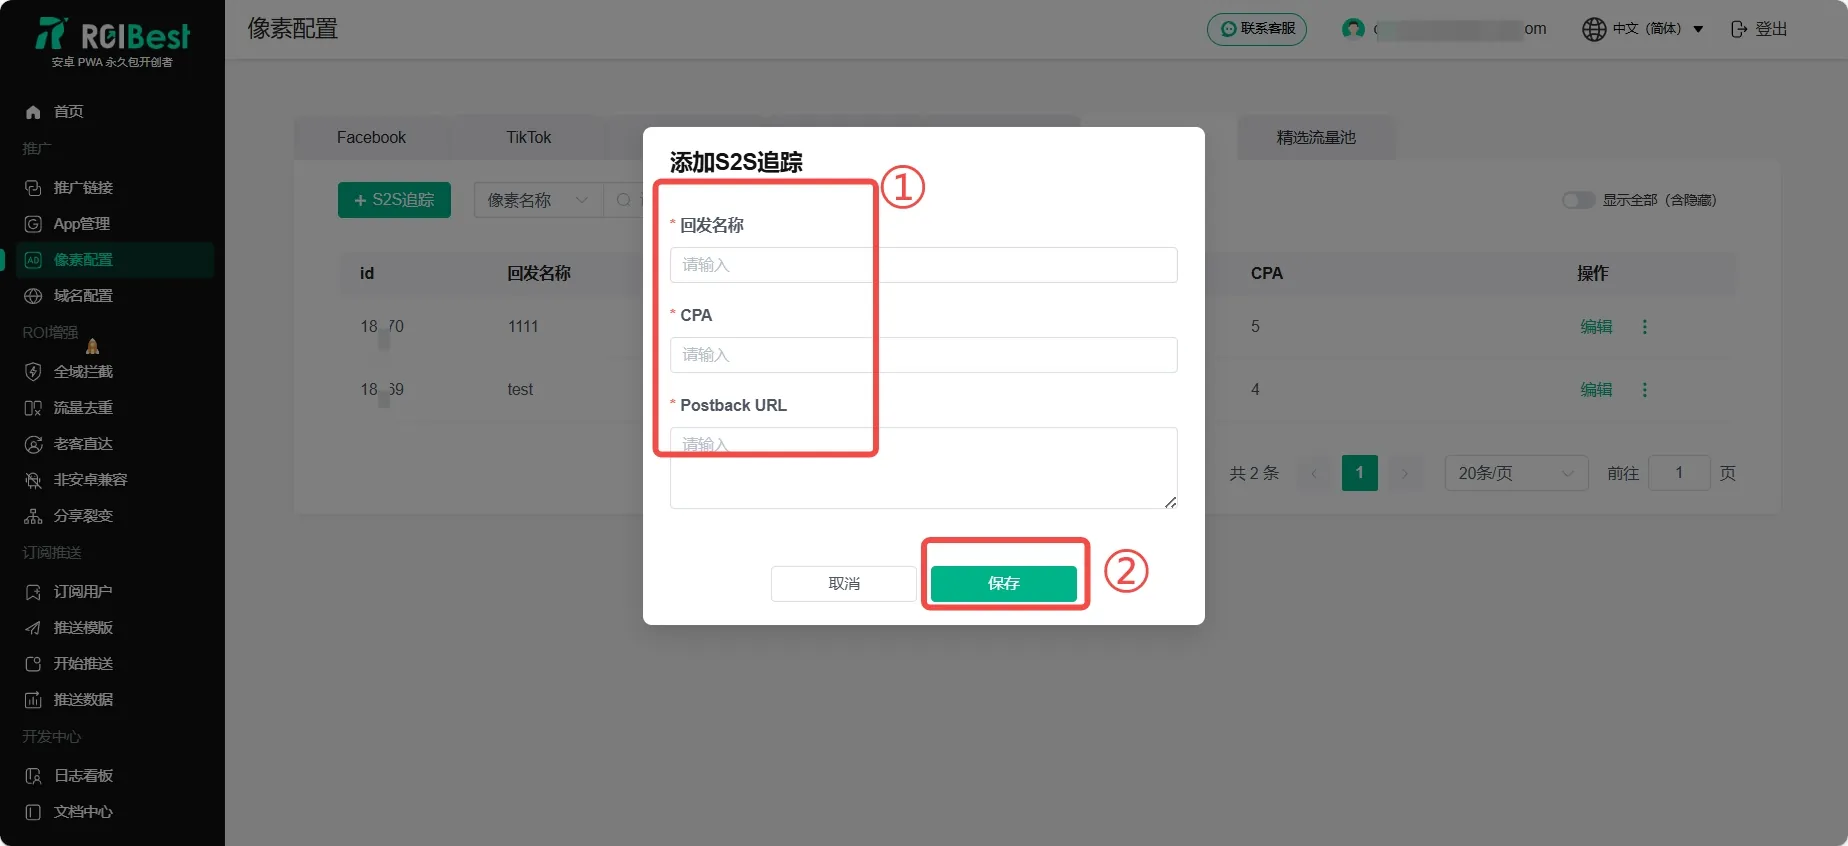
- Enter the S2S tracking information from the Traffic Stars dashboard into the corresponding fields. Paste the S2S link generated earlier into the Postback URL field;
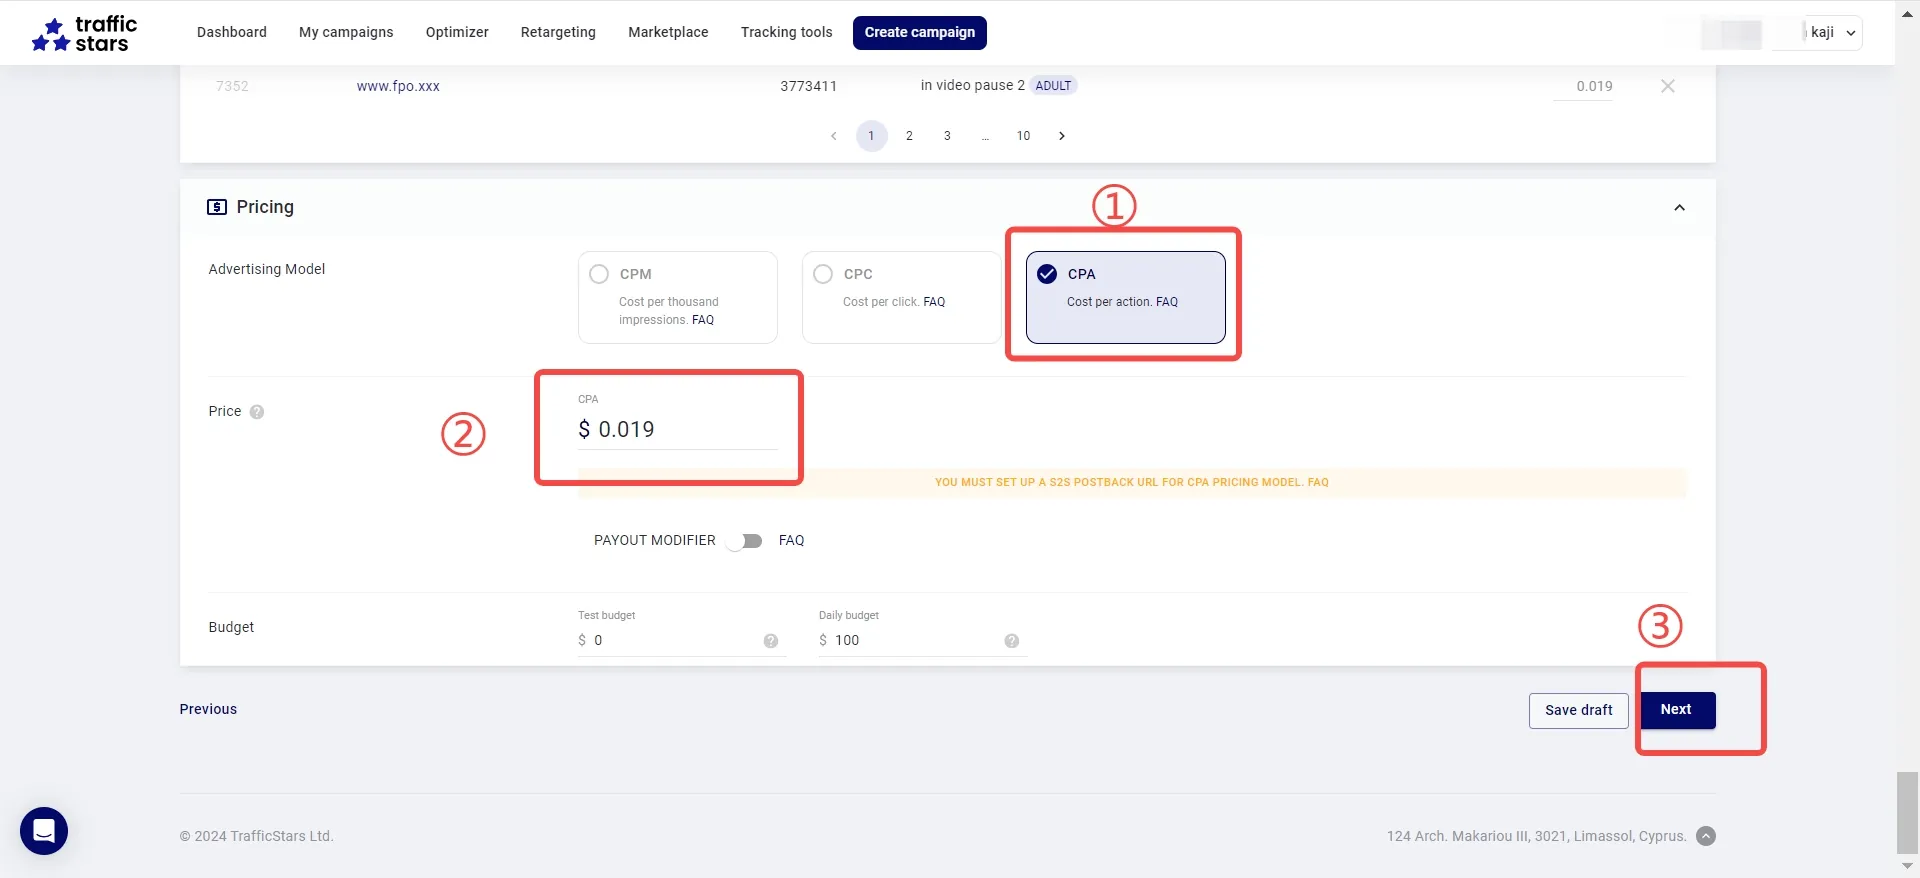
Note: The CPA price must match the price set in the Traffic Stars dashboard;
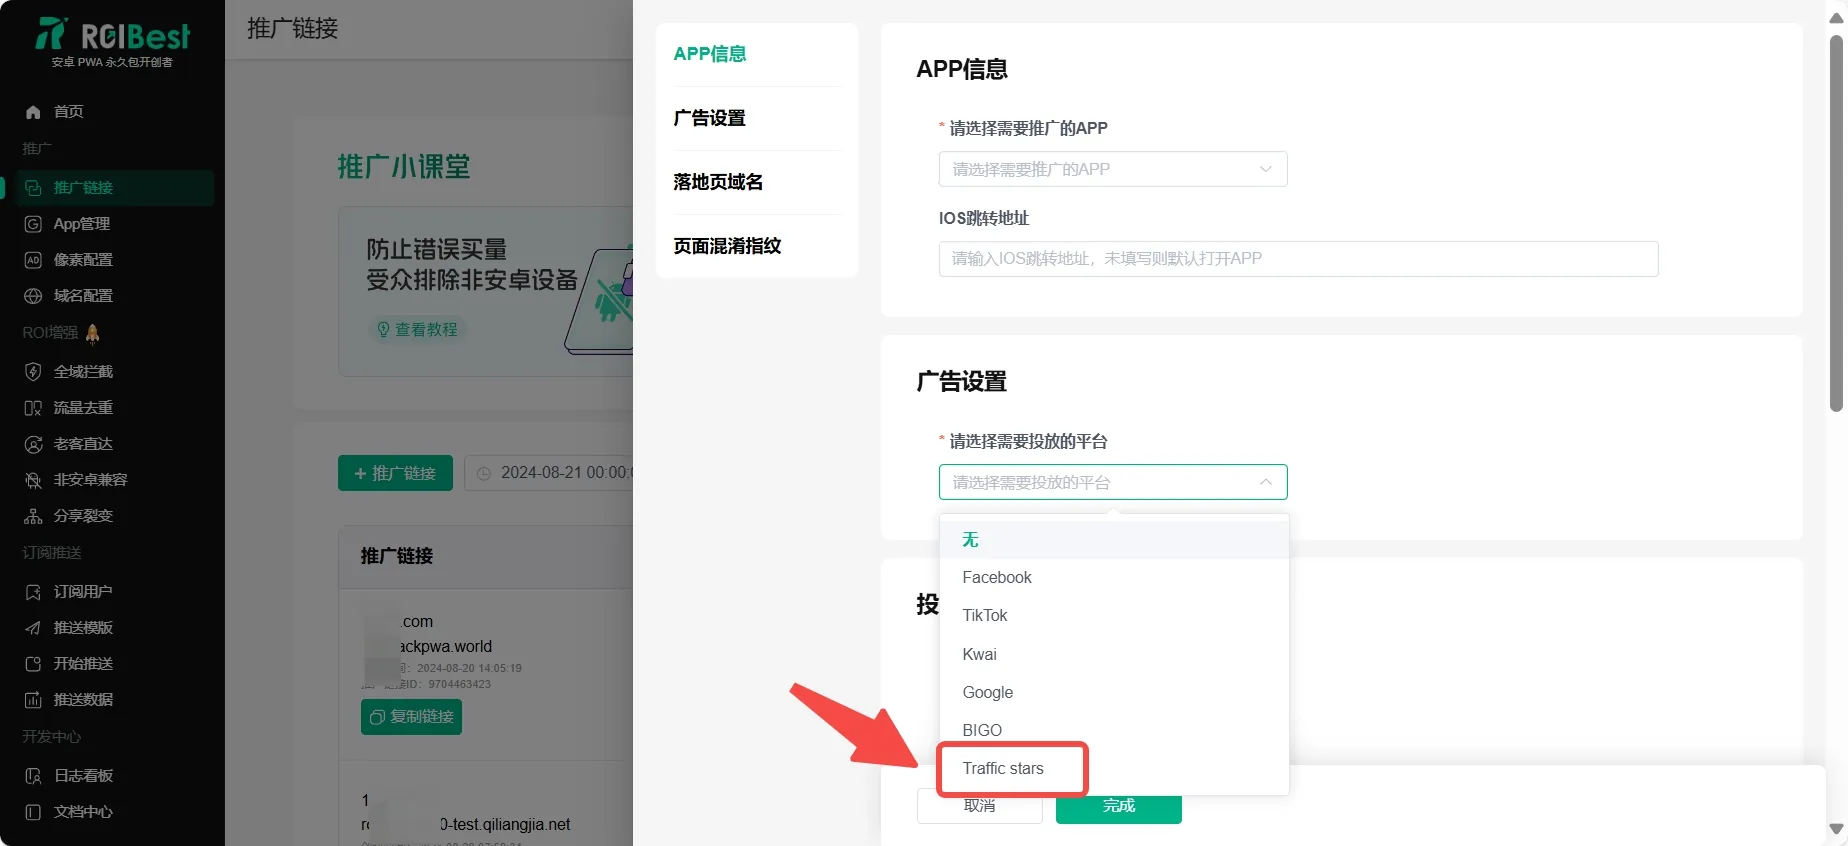
Step 4 - Create a Dedicated Traffic Stars Promotion Link
- Go to [Promotion Links] in the left sidebar. Set up the promotion app info as needed, select [Traffic Stars] as the target platform under [Ad Settings], generate the Traffic Stars promotion link, and enter it in the Traffic Stars dashboard for promotion;
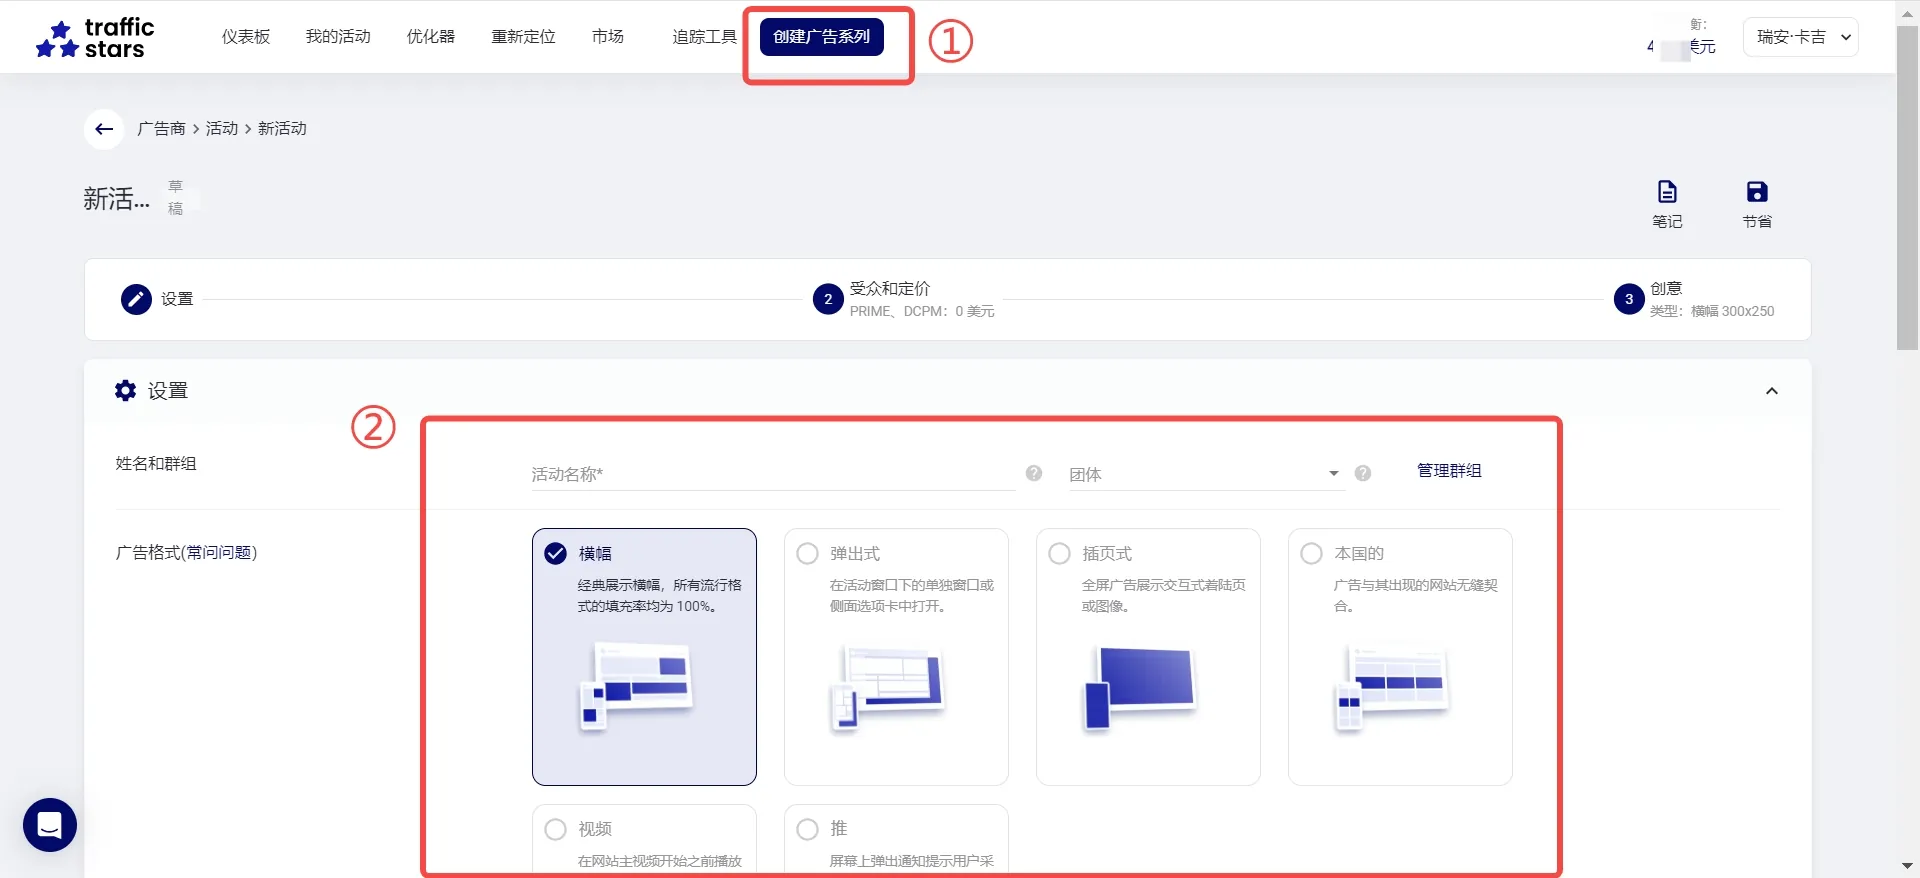
Step 5 - Create an Ad Campaign in Traffic Stars
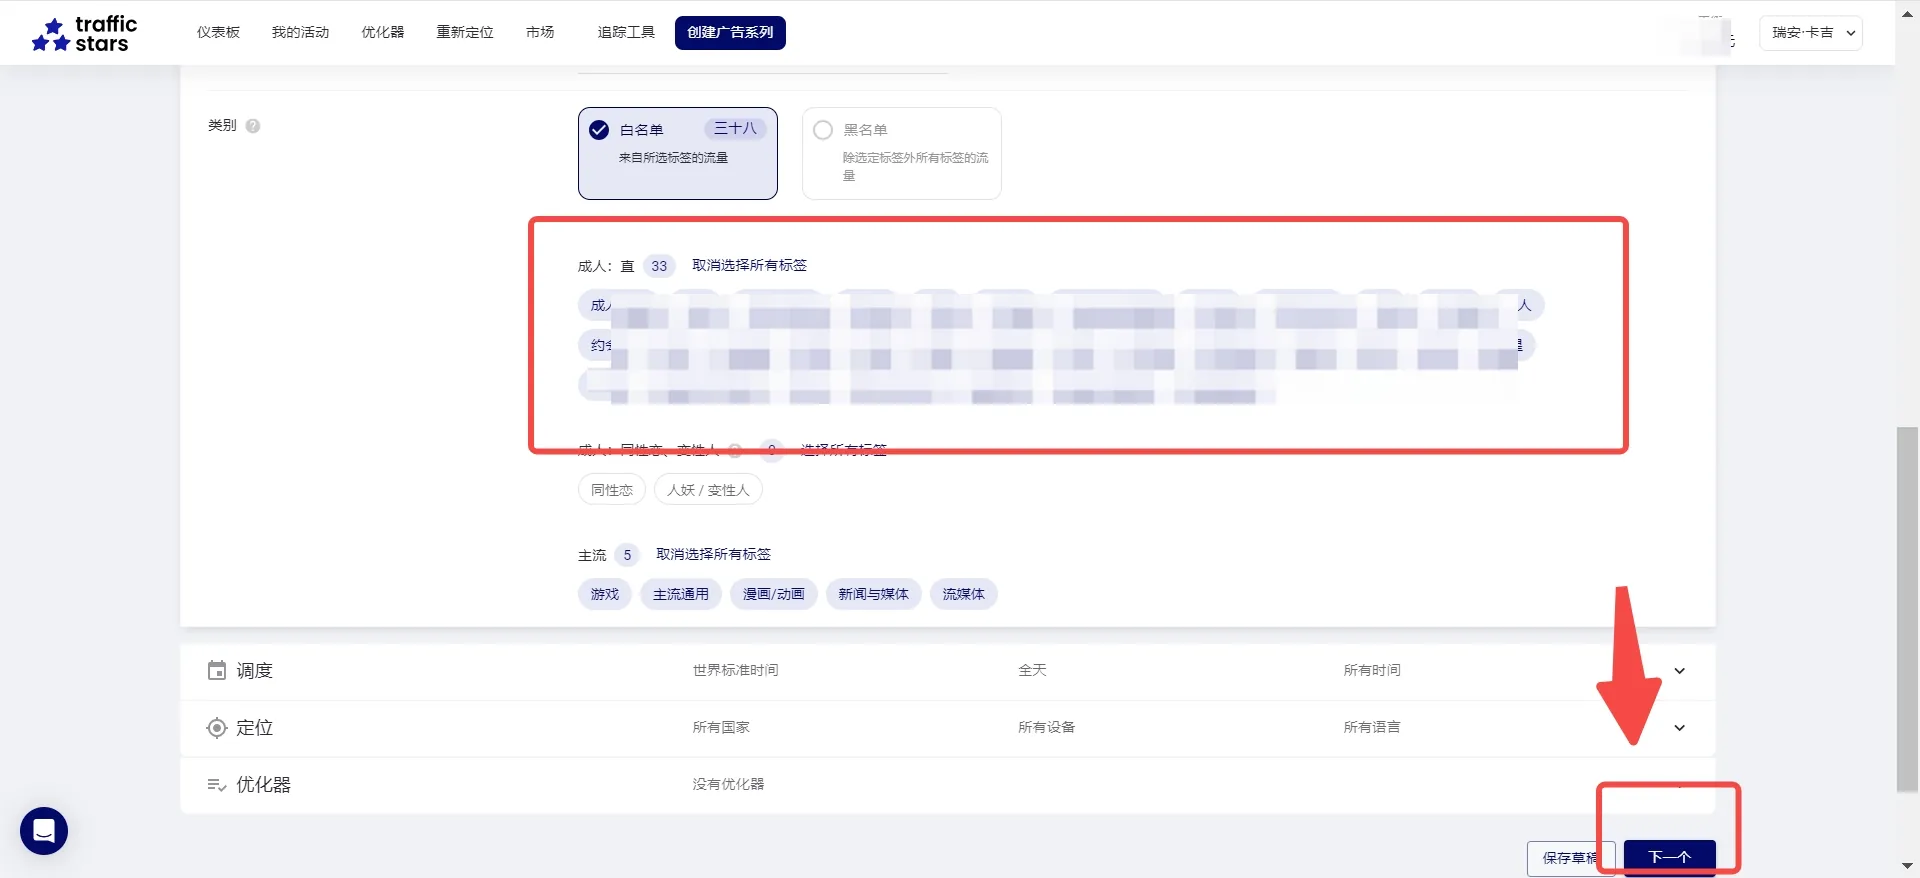
- In [Create Campaign], configure the campaign name, ad format, target audience, etc. based on your needs, then click [Next];
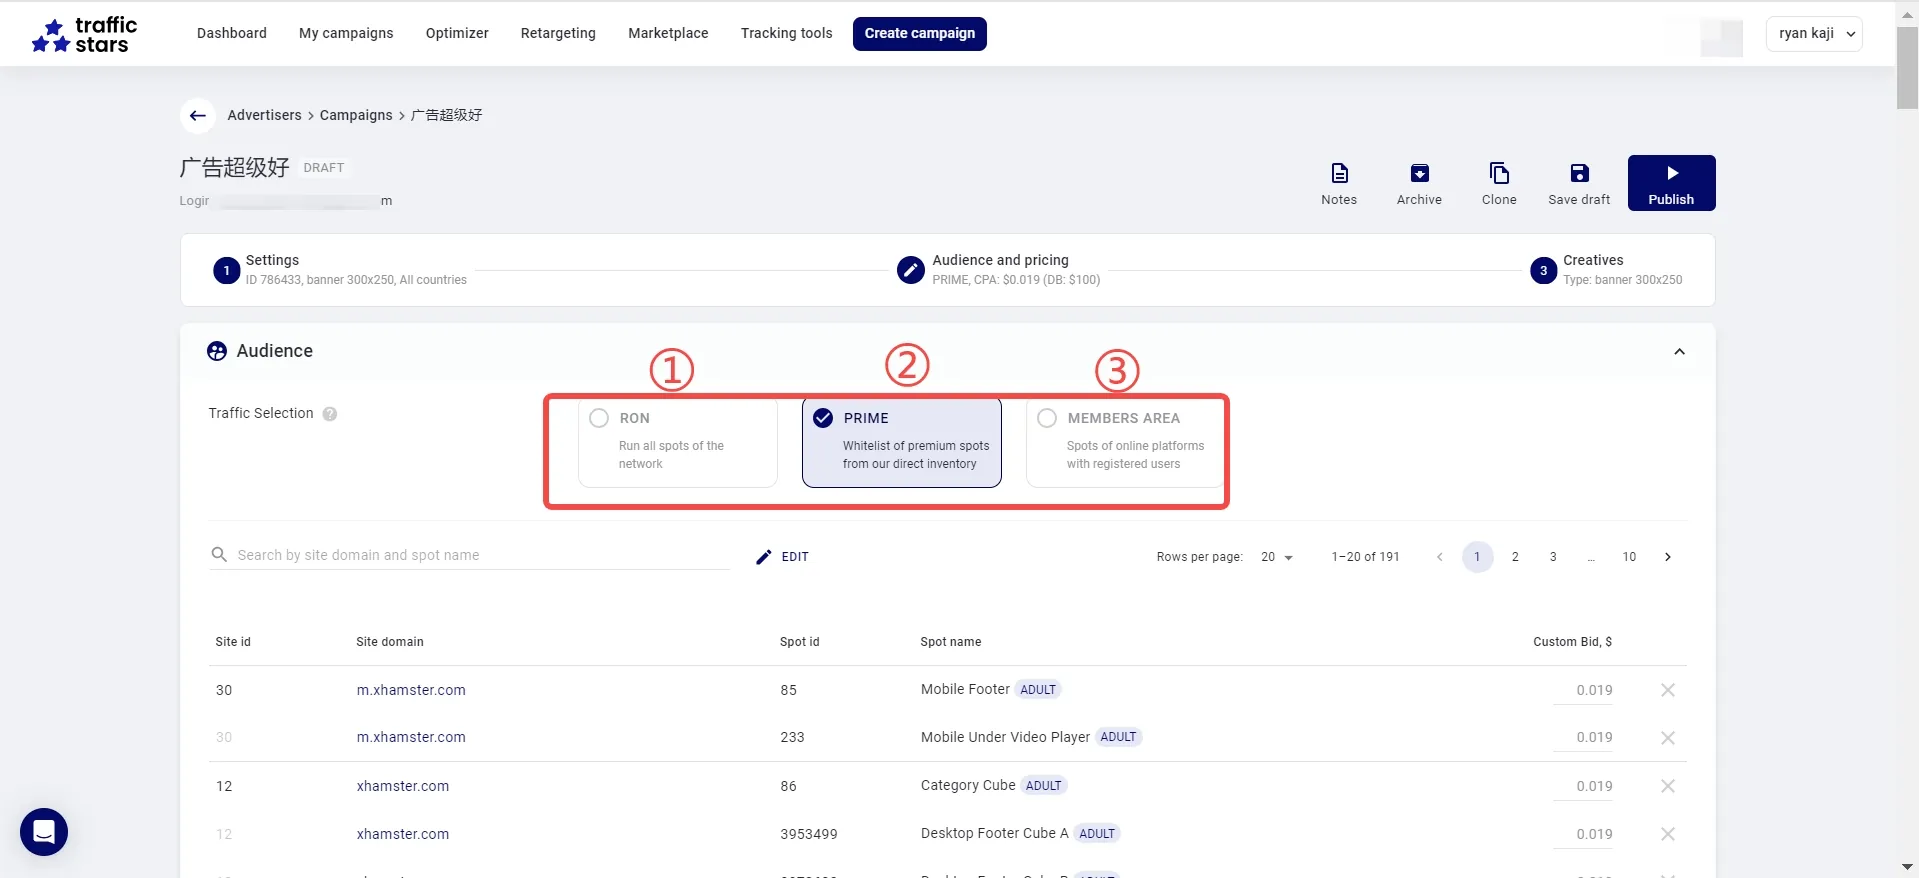
- Select the websites or audience for ad delivery based on your needs. Options ① and ② support CPA; option ③ supports CPM only;
- Important: ① Select CPA mode; ② The CPA price must match the CPA price in the ROIBest dashboard;
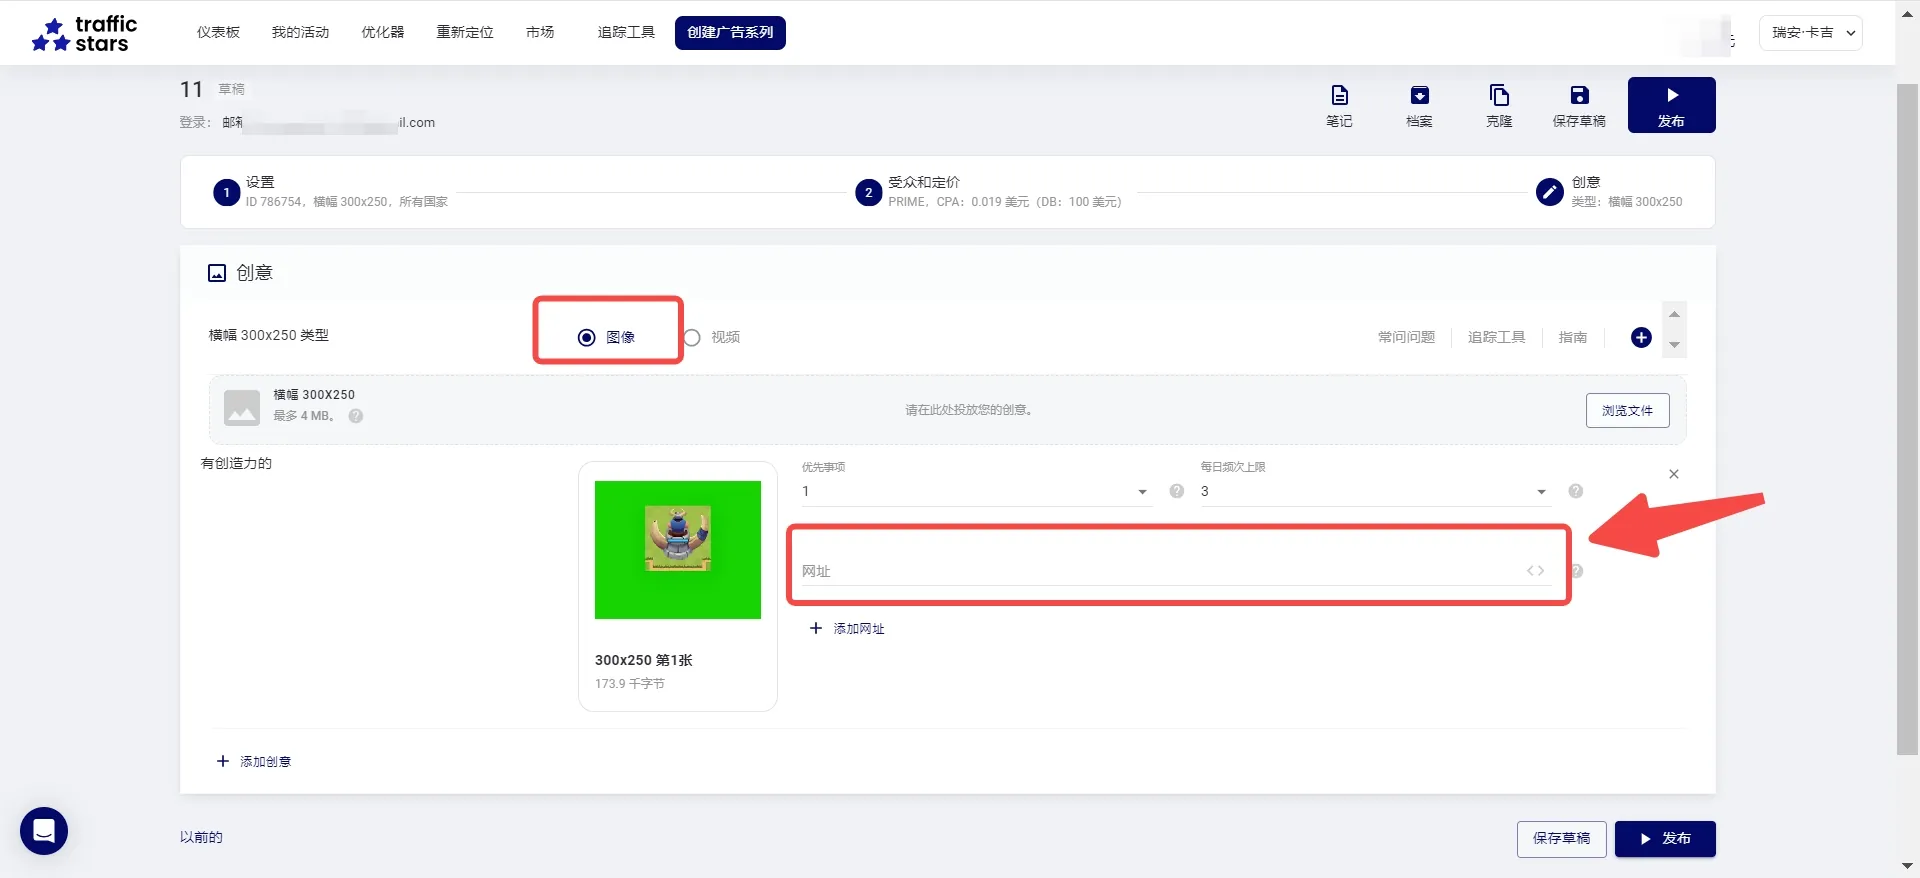
- For the creative, select [Image]. Paste the dedicated promotion link generated from the ROIBest dashboard into the [URL] field, then click Publish;